Review of Leather workshop with Hammered Leatherworks

12 Feltwest members attended this workshop, where we got to use leather tools and materials that most felters were not familiar with.

The purpose of the workshop was to cut and attach leather fittings and hardware to make the piece of very strong felt into a useable bag. Participants were required to bring a piece of felt with them, suitable to be made into a messenger bag/backpack. This involved specialised tools, supplied by Bec, who taught the participants how to use them. Below is a summary of some of the tools and skills learned in the workshop.

A strap cutter was the first tool used. The width on this can be set to enable cutting of different width pieces as required. Alternatively, a rotary cutter can be used along a straight edge.

A quilting square is used to measure straight lines and angles.

A diamond pointed stitching chisel is used to make holes in the strap preparatory to stitching, as the leather is too thick to pierce while stitching.

Fittings (ie rivets, eyelets, buckles etc) provided were of solid brass.

Buckles require an inch length of strap to go through the buckle and allow for a bit of movement. The tongue on the buckle needs a slot to allow it to move and work effectively. A special ‘oblong’ punch is used to make the hole. If the strap for the buckle is to be adjustable, 10 holes would be good, approximately an inch apart, starting 2 inches from the end.


Saddle stitching is a very secure type of hand stitching that works well on leather. Waxed linen thread is the best choice, as it is waterproof, and won’t be eaten away by the tannins in the leather. Saddle stitch starts like running stitch, but when you reach the end of the stitching line, you work back the other way to fill in the blanks.

Bec is very competent with using tools and understanding how leather works. She is a clear communicator and a patient instructor, thankyou Bec for leading us through the use of unfamiliar tools and equipment to make a wonderful felt and leather bag. The workshop went overtime, and some of the bags are not yet completed. Feltwest has purchased a set of leather tools and the bags can be completed at a Feltwest Tuesday or Saturday meeting. 

Workshop Review Katia Mokeyeva, March 2,3,4th 2018

Feltwest members have been admiring Katia Mokeyeva’s work for some time, and some have participated in her on-line courses, so Katia’s visit to Perth was keenly anticipated, and we were not disappointed!

Katia gave a talk about her work at Craft House on the Thursday evening, and brought along some of her stunning garments from the 2017 exhibition, Sea State at the DHG Gallery in Prato, Italy where she worked in collaboration with Fiona Duthie.  Images from Katia and Fiona’s earlier 2015 Sea State exhibition in Newcastle, Australia were also shown.

Katia talked about the inspiration from nature and the ocean that influence her work and creative process.  This presentation was very much enjoyed by the 25+ people in attendance, and served as a wonderful introduction to the workshop that was to follow over the next 3 days.

Twelve lucky Feltwest members participated in the three day workshop.  Katia explained how natural plant fibres can be incorporated into felt to give stretch to felt garments, and to create rich textural surface designs.  Three sample pieces were made in the workshop to demonstrate these qualities, and Katia generously shared her ‘cucumber’ design and method for creating her amazing felt shell pattern.    

The use of plant fibres such as Bamboo and Ramie in Katia’s felting techniques was enlightening and created new possibilities for textural surfaces. 


The workshop was given an enthusiastic top rating by the participants, who were expertly led through new ways of working and the creative use of different materials. Everyone commented on Katia’s warmth, patience and generosity.  Thank you Katia for a wonderful and inspiring workshop.

Dyeing workshop Sara Quail

Dyeing 101 workshop with Sara Quail, Feb 2018.
Techniques and tips for dyeing silk, cotton and other cellulose fibres.

Fibre Reactive Dyeing cotton and silk with Sara Quail -Sara’s aim was to teach participants how to pattern silk and cotton with fibre reactive dyes using a low immersion technique-ie by applying dye directly and manipulating the fabric. This was done using basic equipment in a small work area.

Dyeing 101 with Sara Quail

Sara outlined the safety requirements for using the materials utilised in the workshop, as well as some mess avoidance techniques for persons and the work area. She taught participants how to mix the soda ash in which the fabric is initially soaked, and how to mix the dye in the correct proportions to achieve a range of colours. She stressed the importance of rinsing equipment to avoid contaminating the colours being mixed, and the necessity of labelling the dyes that are produced. She taught participants how to batch, cure and rinse dyed pieces to achieve the best possible dyeing results.

Fibre reactive dyeing cotton and silk with Sara Quail Dyeing cotton and silk with Sara QuailFibre reactive dyeing cotton and silk with Sara QuailFibre reactive dyeing cotton and silk with Sara QuailFibre reactive dyeing cotton and silk with Sara Quail    Dyeing cotton and silk with Sara QuailFibre reactive dyeing cotton and silk with Sara Quail    Dyeing cotton and silk with Sara QuailDyeing cotton and silk with Sara Quail Fibre reactive dyeing cotton and silk with Sara QuailFibre reactive dyeing cotton and silk with Sara QuailDyeing cotton and silk with Sara Quail

As well as these basic & necessary processes, Sara taught a variety of techniques that produce different effects on the finished piece. These included working flat, tray pleating, crystalline, folding, doughnut, twisting, coiling, and how to dye skeins of thread or fibre.

She had a myriad of samples including how the dye takes on different fabrics and fibres. Other uses for Fibre Reactive dyes and how they can be used to dye protein fibres like wool were discussed.

Sara also provided comprehensive notes, a list of suppliers of Fibre Reactive dyes, and some websites as references for further reading.

I think I can conclude that a messy but fun day was had by all!

Alison Higgins

Fibre reactive dyeing with Sara QuailFibre reactive dyeing cotton and silk with Sara Quail  Fibre reactive dyeing cotton and silk with Sara Quail Fibre reactive dyeing cotton and silk with Sara Quail Fibre reactive dyeing cotton and silk with Sara Quail Fibre reactive dyeing cotton threads with Sara Quail

Participants dyed many pieces of fabric and items, so there was no time dry them all and view the results on the day.  There was quite a display at the first Feltwest meeting of the year of their achievements as well as some further exploration with the leftover dyes they took home.

Jigsaw Weave & Felt with Martien van Zuilen

Workshop – Nov 2017

Presented by Martien van Zuilen, a FeltWest member and international tutor, participants spent a very pleasurable 2 days learning her unique Jigsaw Weave & Felt technique. With its strong visual impact, the opportunities to include this woven effect in handmade felt are endless – homewares, accessories and wearables or as accent pieces for larger projects. Inspired by slumped glass techniques and the calming process of re-piecing jigsaws, her technique involves using fine merino pre-felts, which can be commercial pre-felt but which Martien often makes by hand using her hand-dyed wool. After selecting a colour palette to produce the desired effect, pre-felt is cut and re-pieced.

The first day was spent making a sample and coming to grips with the technique. Colour selection, the thickness of the pre-felts and the degree they have been pre-felted, play a key role in this technique. Martien had brought an amazing array of prefelt and many samples to get the creative juices flowing. She guided us through the planning and specific process of cutting to ensure a well-defined result. The actual method of interweaving and re-piecing the cut pre-felts had some unexpected elements, but it soon became apparent this was essential to the process. Paying attention to detail in the early stages is very important, but with immense benefit to the final result!

The 2nd day was spent working on individual larger pieces which included bags, cushion covers and table runners. Embellishments and fabric can be incorporated and minds were over-flowing with many ideas on how to create texture, optical illusions and functionality. Specific ways of dealing with resists for hats and bags were covered as well as emphasising her specific felting and fulling methods she uses for the Jigsaw technique. Her gentle approach to felt making is evident in the smooth, high quality felt pieces that were created.   

Those who attended really enjoyed trying out a new technique. The technical process gave everyone an opportunity to achieve precise results as well as refining felt to a new level. A very knowledgeable and sharing tutor who had some memorable ways of remembering her tips and tricks!

Martien van Zuilen (PhD) is a felt artist and dyeing artisan living in Perth, Australia. She exhibits her high-quality and distinctive felt art nationally and internationally and through her dyeing business Colourant Dyeworks she supplies the finest hand-dyed Merino wools, silk fibres, yarns and fabrics to felt makers and textile practitioners worldwide. Since the late 1980s she has delivered felt-making workshops at all levels of experience throughout Australia, as well as in Europe and throughout the USA. Martien is the founder of the Victorian Feltmakers and for 18 years coordinated the Australian National Yurt Project. She is the Convenor of Fibres West Inc. and the editor of FELT, Australia’s national felting magazine with international reach. Her artwork is published in numerous international publications, including Showcase 500 Art Necklaces (book), Textile Fibre Forum, Felt Matters, ViltKontakt, Fiber Art Now, Yurts Tipis and Benders (book), FELT, verFilzt Und zugeNäht, the 2015 book Pots and Pods for Feltmakers, Adventures in the Third Dimension, and the 2016 book Worldwide Colours of Felt. www.martienvanzuilen.com

Borris Lace Workshop with Leiko Uchiyama

Borris Lace Felt with Leiko Uchiyama  – Feltwest workshop – October 7 & 8 2017

On the weekend of October 7 and 8, international felt artist and tutor Leiko Uchiyama presented her Borris Lace Felt workshop to 11 enthusiastic members of Feltwest. Leiko is well known in the world of felting for her distinctive Pine Needle Felts, a technique she developed after seeing patterns of fine pine needles on pristine snow in her home town of Sapporo Japan.

For the past 5 years, Leiko has lived near the small village of Borris in Ireland and it was there that she first encountered Borris Lace*. Her workshop ingeniously combined her interpretation of Borris Lace in Felt and her Pine Needle technique. It was clear from the start that students were in for a treat.

Leiko began by explaining the history and principles of Borris Lace and how she came to interpret and translate this in felt. She was well organised and prepared, showing everyone multiple samples while explaining the various possibilities of Borris Lace Felt. She had also managed to bring a wonderful collection of her sumptuous hand-dyed fine merino wool (16 & 18 micron) and merino/silk mix fibres; no mean feat for having travelled and taught classes around Australia for 6 weeks before arriving in Perth.


Then the work began! Everyone made specific pre-felts to resemble lace tape and prepared stacks of pine-needle fibres, all the while designing and then laying out larger works. With well over 50% shrinkage from start to finish, rolls of bubble-wrap were involved!

The afternoon of day 1 and part of day 2 was spent on laying out the large works. Meanwhile Leiko imparted lots and lots of tips on her specific techniques and fine felting more broadly. It included handling of fibres, laying out for different effects, laying wool in narrow width areas without getting fluffy edges, making specific cords for textural effects, creating a balanced and intricate design, attention to detail, rolling and finishing, and much much more. Leiko’s dedicated, methodical and gentle approach, and her generosity in sharing her knowledge brought to the fore the value of attending a class in person and working hands-on and face-to-face with a tutor.

Leiko was a delightful and fun tutor who was very clear in her explanations and instructions, and due to her good management, all works were finished by the appointed time! At the end of the class, 11 beautiful wraps and scarves were displayed and Leiko pointed out specific areas of interest in each work as a way of recapping the entire process and the class.


Thank you Leiko for a wonderful class, and thanks to all the students who enrolled!

– Martien van Zuilen

For more info on Leiko’s work, see http://leikofelt.com

Leiko Uchiyama’s work is also featured in the Australia magazine Felt (issue #17), with an artist profile and a pine-needle felt project written by Leiko! http://www.artwearpublications.com.au

* Borris Lace is a lace made with lace tape joined by various filling stitches. The name originates from the village of Borris in Co Carlow, where Leiko Uchiyama currently resides. In 1857 Lady Harriet Kavanagh of Borris House visited Corfu and was so impressed by the specimens of old Greek Lace that she bought some pieces and brought them home along with tape laces from Venice and Milan. She felt that they could be copied in Borris by the local women, thus enabling them to add to the small family earnings and aid local employment. The well-known Borris Lace Collection (housed in Borris House) was painstakingly researched and catalogued by Australians Marie Laurie and Annette Meldrim. Their 2010 book The Borris Lace Collection : a Unique Irish Needlelace is still in print today.

Feltwest October Toss N Tell – Surface Design

Sara Quail surface design felt

October 2017 Toss ‘n’ Tell

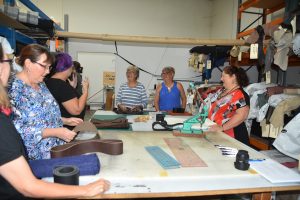
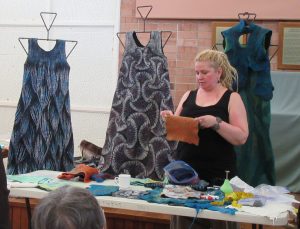
Demonstration – Surface Textures by Sara Quail 21 October 2017

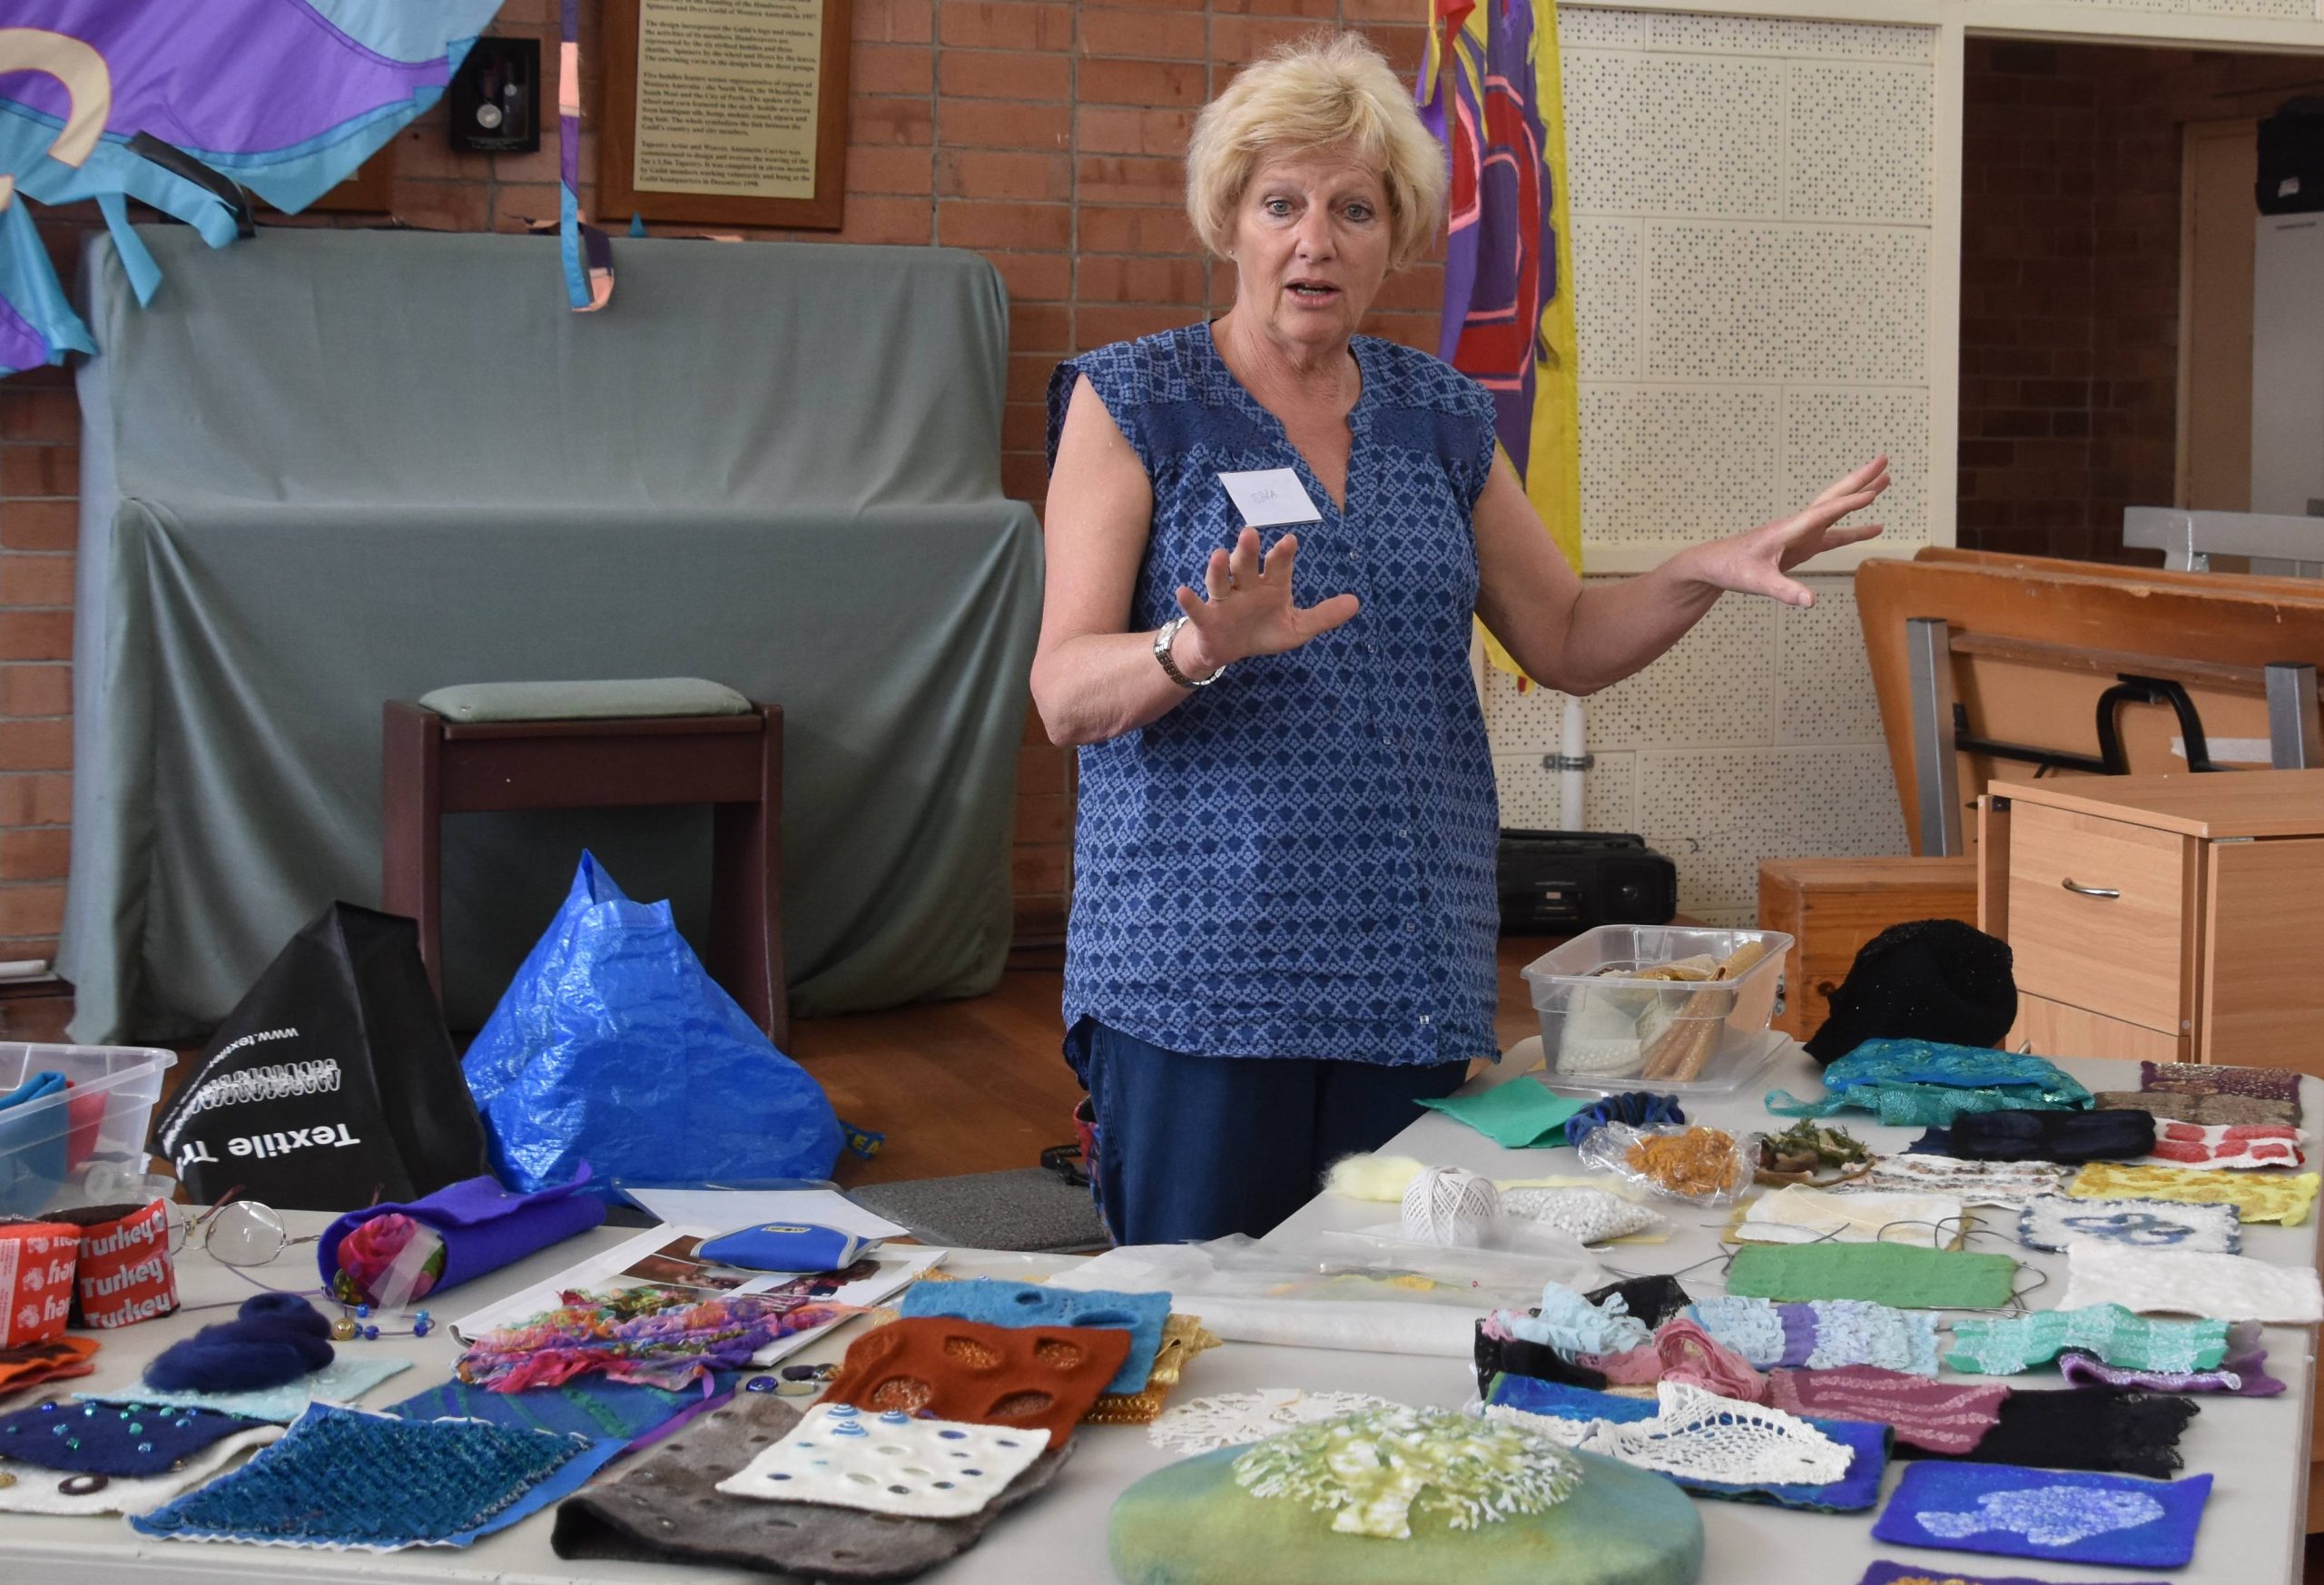
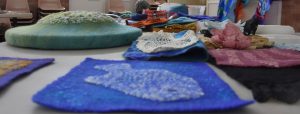
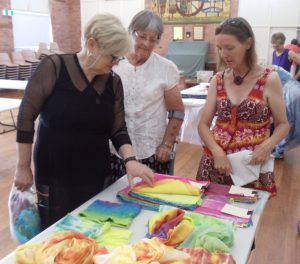
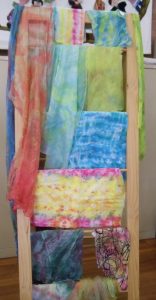
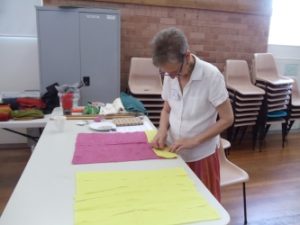
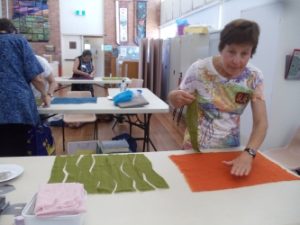
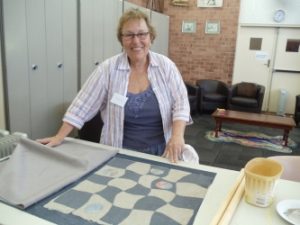
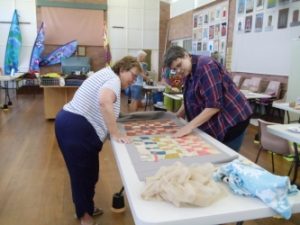
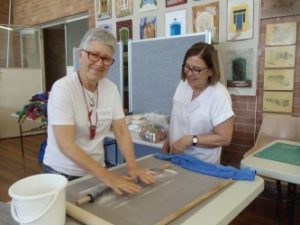
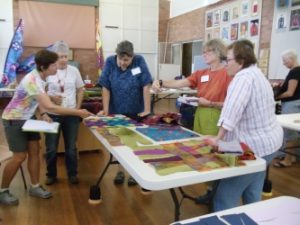
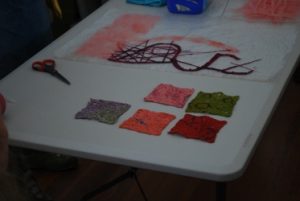
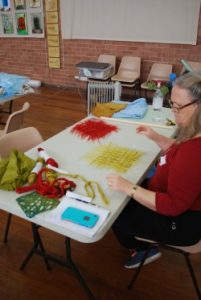
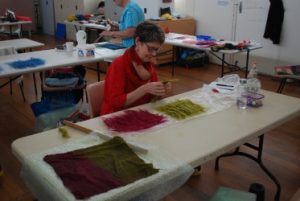
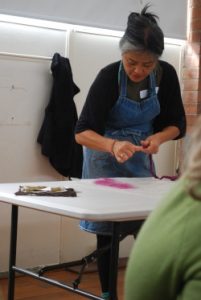
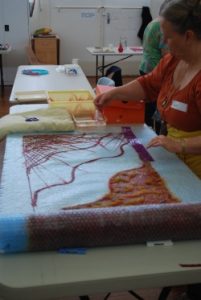
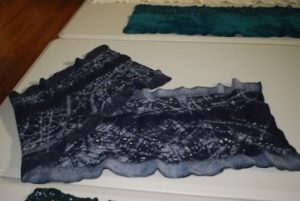
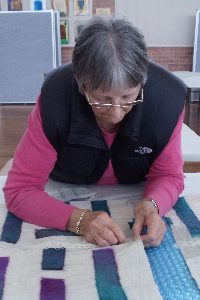
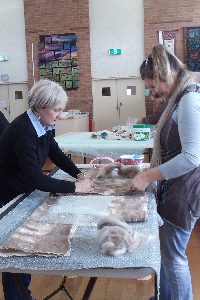
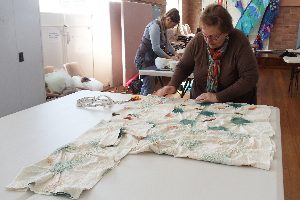
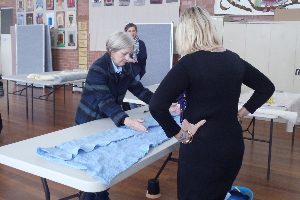
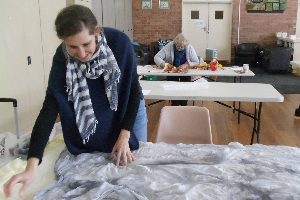
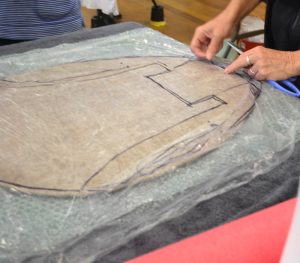
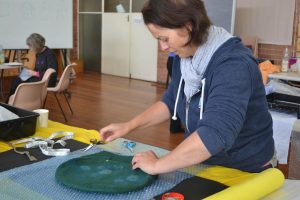
Sara presented a fantastic and comprehensive demonstration, encompassing a huge variety of ideas & techniques that she has been experimenting with. I can hardly begin to represent it here…The accompanying pictures will help to tell the story.

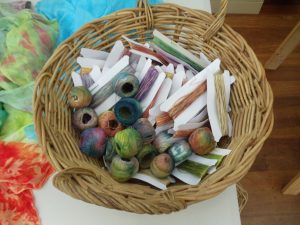
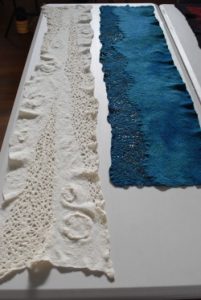
Looking beyond conventional nuno felting with silk fabrics, Sara showed how other types of fabrics and fibres could be used to achieve surface texture. She had samples with beaded chiffon, sequinned, printed and embroidered synthetic organza, metallic mesh, hessian and recycled knitwear. As long as there are spaces through which the wool fibres can migrate, a range of synthetic yarns and even rug wool, can also be successfully felted. Wool yarns are more easily incorporated, while wool nepps don’t adhere well unless carded with a very small amount of wool fibre.

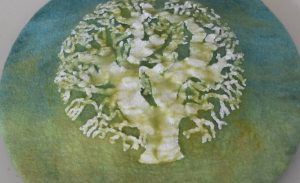
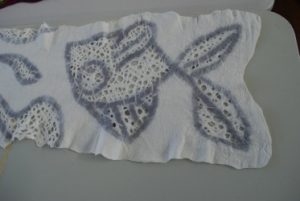
Because of their ‘holey’ structure, she has felted pieces of Cricula cocoon, skeleton leaves, crocheted items and nylon lace. Lace pieces can be laid out in lines, curves, grids or layered to create frills. Free machine embroidery worked on felt friendly fabric scraps, between 2 layers of water soluble fabric, creates another unusual effect with the stitching remaining on the surface. Generally, these items were laid out on dry wool fibre using gentle felting techniques until items are well attached.

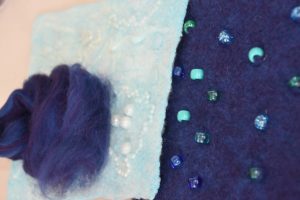
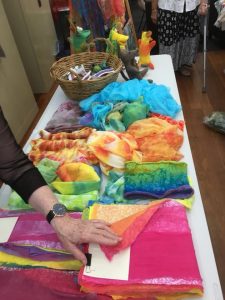
Raising the surface a little more, she demonstrated how medium sized beads and buttons with shanks can be in incorporated without stitching. A suitable needle is threaded with a thin piece of roving and passed through the hole. With about an inch of wool either side, this is then fluffed out and felted in with the wool base.


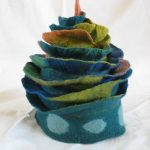
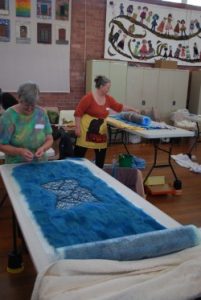
To create thin raised lines, nylon strings with their ends protruding can be placed between 2 wool layers, and removed once the piece is very well fulled and completely dry. Inclusions of found items like string, cords and polystyrene beads between wool layers create curvy lines and little lumps under the surface. She showed us how bigger items like shisha mirrors, glass beads, buttons and small objects can also be felted between layers of wool. Near the end of felting, the top layer can be cut to reveal about 2/3 of the encapsulated object.

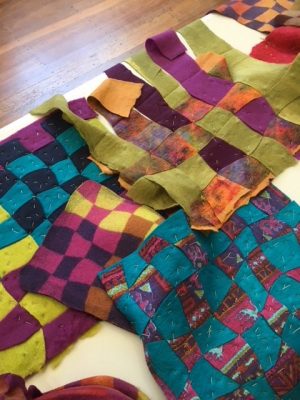
Sara then showed us how to create a crisp pleated effect by using thin plastic or tin foil on damp silk gauze or paj. Once the folds are created, wool fibre is placed on the fabric side and then carefully felted. The same method was used to produce a sample with multiple felted flaps. Instead of fabric, a prefelt was laid out on thin plastic, pleated, fibre placed on top and then felted. Many of her samples involve a lot more massaging at the beginning of the felting process because rolling too early is inclined to make things shift.

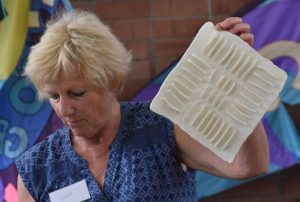
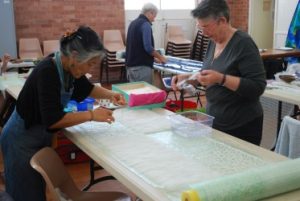
Using resists of narrow plastic strips or polyester ribbons, Sara revealed how a chenille effect could be achieved. The resist material is laid on the wool fibre and then covered with a lightweight fabric (silk gauze, paj or chiffon) and then felted.  The fabric channels created are cut through to produce a chenille look. Varying widths of channels, type of fabric(s) and the amount of wool used will produce different results.
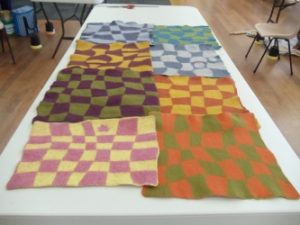
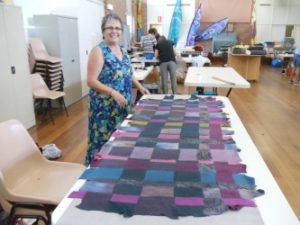
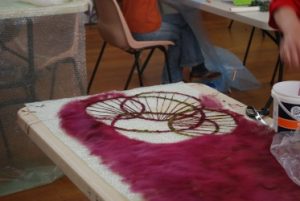
Expanding on the ‘cracked earth’ technique where resist strips are laid between equal layers of wool and then cut, she showed how this principle can be used in other ways. Simple organic designs can be dramatic if contrasting colours are used and the cut edges are manipulated upwards. With additional cutting and manipulation near the end of the felting process, ‘doughnut’ shaped resists can become creative circular designs.


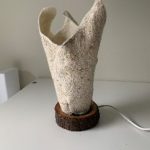
And lastly, Sara covered 3 distinctly different Shibori style techniques. This involves enclosing objects in a firm prefelt with either stitch or binding. Using very strong thread, more precise results can be achieved with stitching methods but are also more time consuming.

Toss ‘n’ Tell 21 October 2017


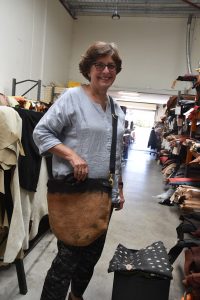
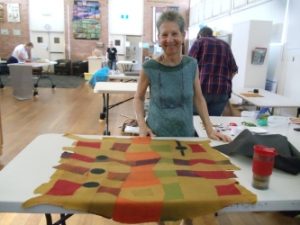
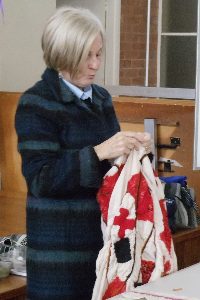
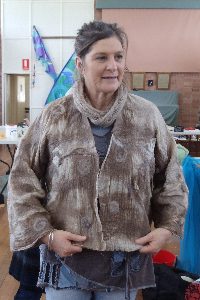
Sara Quail -asymmetric cape. Sara dyed this wrap a deep vibrant blue in both fibre active dye & acid dye in 2 stages, as it is made of wool, soy and cotton fibres, which respond to different types of dye. It was her first experiment with ‘deconstructed nuno’.


Jean McKenzie– made a beautiful white pine needle felted scarf/wrap at Leiko’s workshop. Also 2 felted seahorses as baby toys.


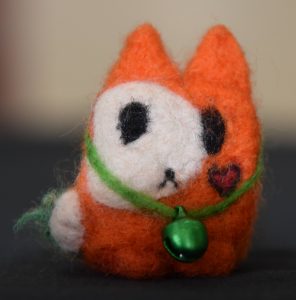
Mother and daughter felt team – A stunning needle felted picture of Tranby House in Maylands. Also displayed a blue, green, yellow pine needle felted scarf made at Leiko’s workshop and the needle felted cat “The Box Kitty”.


Stacey – a pine needle felted scarf produced at Leiko’s workshop. She also showed us a Felted Collar made via an online workshop with Fiona Duthie “Felting over the Edge”. (photo not shown).

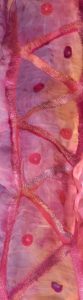
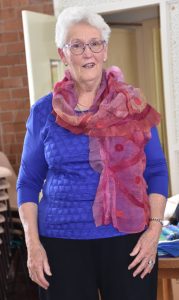
     Pat – Nuno scarf in pink tones, very flattering.

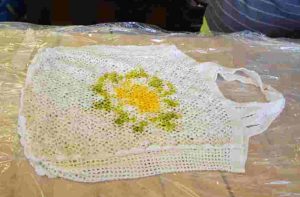
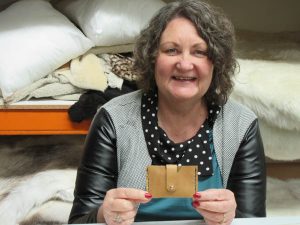
Judith – a shoulder bag with a face that she made many years ago. It provides her (and others) with a good source of amusement.


Toss ‘n’ Tell News 21 October 2017

Chair: Marion Finneron.

Craft House, Menora.

Reminders :

  • The planning meeting is set for 28th October, which is to plan for 2018. The committee will look at suggestions noted in the suggestions book from members, among other things.
  • Saturday 18 November will be the last meeting for the year, and will be our 21st Anniversary party. There will be a celebration lunch at Craft House with members & past members. Members were asked to contact any past members if they are able, many are not on email. Members were asked to bring a plate of food to share at the lunch party. Members were invited to bring a handmade wrapped gift for the ‘Kris Kringle’ if they wish to participate. There will also be the raffle draw from the $2 tickets that members pay each meeting. In order to win the prize, the winner must be present at the party on the day. The prize is a hamper of ‘felting goodies’.
  • Craft House is open for felting in the morning from 9.30, as usual. Lunch will be at 12.00. There will be an informal Toss’n’Tell at lunchtime.
  • Members were asked to return all outstanding library books by November 18. New books have been purchased for the library. Martien has donated a copy of the ‘Felt’ magazine that she edits to the library.
  •  She advised the members that we have a committee of 7 persons, where previously there had been 10. She called for members to approach the committee if they felt able to help with tasks. There is the possibility of forming subcommittees to help with projects etc.
  • The meeting was advised that there are still places available at Martien’s upcoming ‘Jigsaw felt’ workshop.
  • Marion introduced the committee to the members:
    • Karen Wood has taken on the President’s role of Feltwest.
    • Treasurer: Christiane Gray;
    • Secretary: Marion Finneron;
    • Workshop Co-ordinator: Sue Eslick;
    • Online management: Liz Owens;
    • Committee: Sara Quail;
    • Committee: Alison Higgins

Questions raised:

Q: (Christiane) How do non-internet members find out about workshops etc?

A: A letter was mailed out earlier this year with part of the workshop program. It isn’t possible to do this for the whole year, as the workshop program is an evolving thing.

Q: Is it possible to mail hard copy of e-news out to non emailing members?

A: Suggestion from a member that each non-email member could be ‘adopted’ by an emailing member, who would undertake to send information on.

Q: (Jill Jodrell) Could we advertise the 1st Tuesday felting meetings in correspondence also? Perhaps as a separate reminder.

Correspondence:

Advertisement: Member Liz Arnold is holding an exhibition “Reef- A Fine Line” at the Basement Gallery in Subiaco. All members & others are invited to attend.

Reports:

Martien reported that she hosted Leiko’s “Pine needle felting” workshop.                                           for details see workshop on website

Suggestion:

  • Martien advertised the Fibres West calendar for sale.
  • Martien encouraged the group to make more use of the Facebook page to promote Feltwest members work.
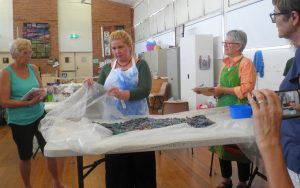
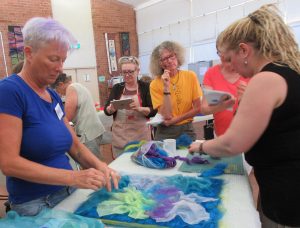
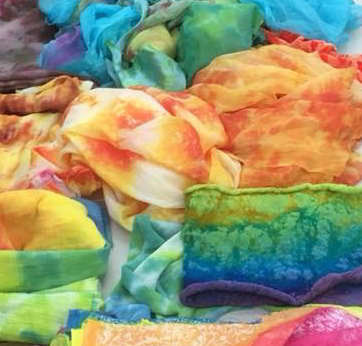
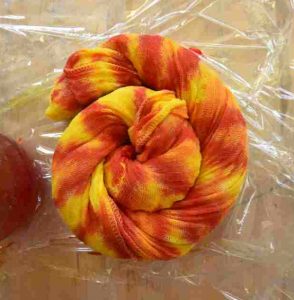
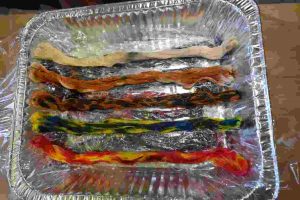
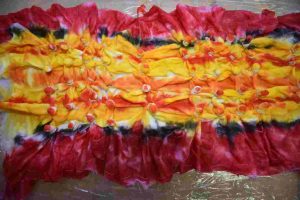
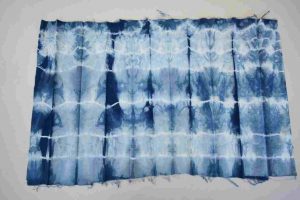
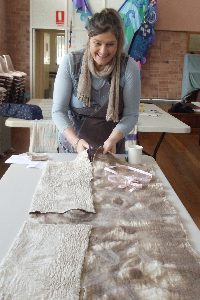
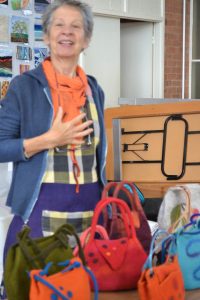
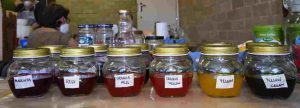
 

Review of Leather Workshop

What an inspiring day looking at the possibilities of adding leather to our felt!  We met at Leather Direct in Osborne Park where there was lots of different leathers and tools available.  

Bec from Hammered Leather works showed us the properties of different types of leather and their uses, from very soft kid leather, used for clothing, to sturdy strap leather.

The range of leathers and colours was staggering, and Paul helped people to find the right piece for their project .

Bec provided all of the tools and leather we needed to  make a small card wallet,  learning the basics of cutting, stitching, and adding straps and rivets.  We learned the secrets of how to make stitches even and neat, and how to deal with the ends.


Then people brought out their felt and Bec helped everyone individually to work out how best to work with the leather to turn their design into a finished project, using leather from her scraps box, or purchased from Leather Direct.  People added a range of leather bases, corners, flaps, straps, gussets…..  Everyone had a different idea, and Bec worked flat out helping everyone with their project.


We didn’t all get to finish, but everyone left with the holes punched, and the materials they needed to complete their project at Home.  Thanks Bec, for sharing your skills, time, tools and materials, and staying late to make sure we were all able to continue with our projects at home.  You have really whetted our appetite for adding leather to our felt.


Marvellous Muslin Jacket with Jan Manning

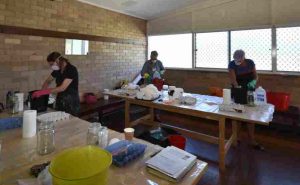
Marvellous Muslin Jacket with Jan Manning August 2017

The aim of the workshop was to produce an economical jacket based on the design principles of the ‘Bog coat’. This was a simply constructed garment found on ancient bodies preserved in 4000 year old bogs in Denmark.

No knowledge of pattern making was required for this garment. Each student came prepared with a large rectangular piece of nearly felted nuno felt, using heavier weight muslin as a base. The muslin creates a more textural look than silk and is very warm. Every piece was quite unique depending on the colour and amount of wool coverage, surface embellishments and the weight of the muslin.

Jan illustrated how a few simple cuts could turn this yardage into a functional and versatile jacket. Various samples of jackets and vests were on hand to illustrate a variety of design possibilities with variable sleeve and body lengths. Folding a paper template helped to visualise the concept.  

Although the technique involves only 2 basic cuts, Jan demonstrated a variety of ways to finish off edges, join seams and shape the garment. She shared her knowledge and problem solving experience in how to deal with various issues and adjustments.

Students were keen to explore different things – variety of fabrics, different wool layouts and intriguing surface treatments possibilities.  There were many tips along the way.

Jan has a herd of alpacas and lamas on her property, and she explained in depth about the virtues and variations of alpaca fibre. She could even tell you the name of animal whose wool she had used in her various projects – it doesn’t get more personal than that!

It was a very enjoyable day, where participants learnt the skills to make a custom fitted jacket, share ideas and be inspired to create further masterpieces at home. Thank you Jan for sharing your knowledge and experiences.

Reporter: Sara Quail

5 August 2017

Bagstyle workshop by Sue Eslick, review by Marion Finneran

The first day started with 7 enthusiastic members who were all oblivious to the cold and very wet weather outside. Another member only came for the second day due to injury.

Sue started by explaining the technical construction of various bags on display. All the bags are made on a resist and used variable layers in the process.

Once a design had been chosen, a resist pattern was drawn from which a resist was made. Thereafter the resist pattern was referred to once the actual resist was covered with the wool.

Sue guided the group through the various stages of  laying the wool including the options of applying the surface decoration at the beginning or at the end of this stage.


The work was then wet down and rolled until it had reached  the pre-felt stage. Many tips and much advice was shared en route.

Once the felt had reached the stage at which the resist could be removed, then the exciting part of cutting the felt  began. Gradually the bag was stretched, massaged and manipulated into shape until the felt was very firm and the bag was a pleasing symmetrical shape.


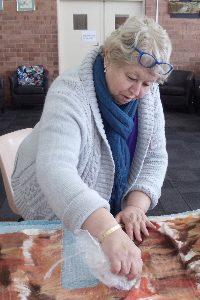
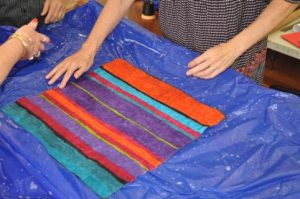
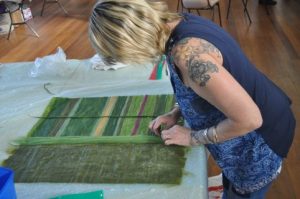
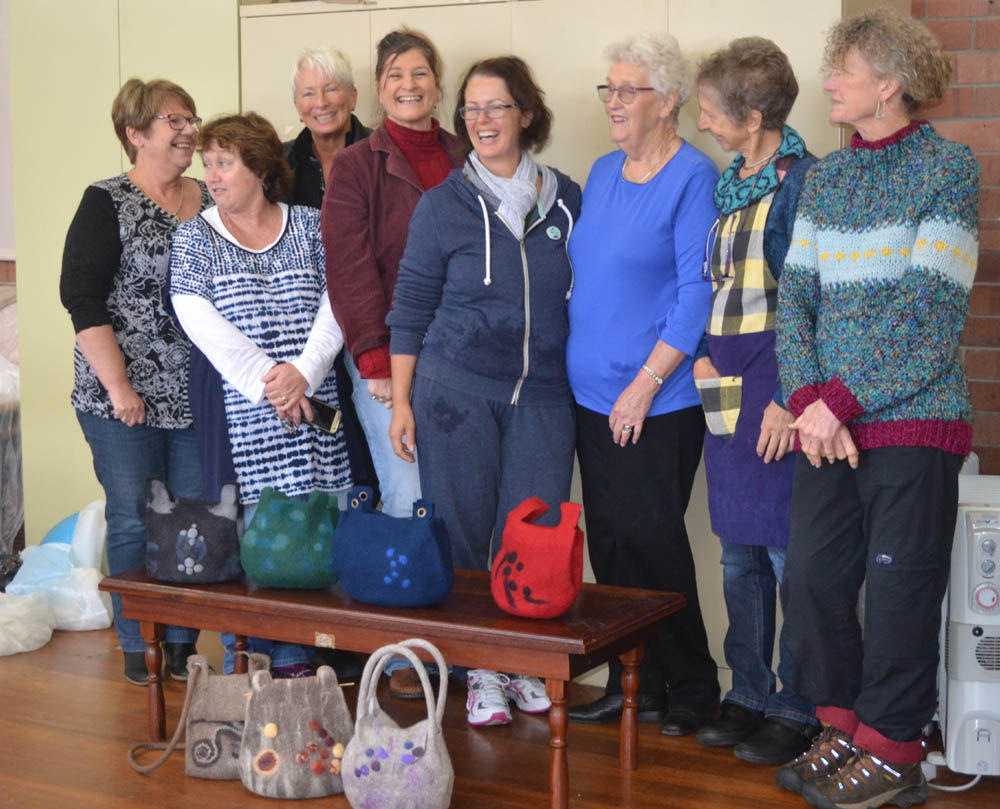
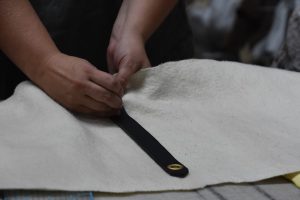
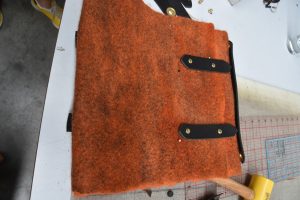
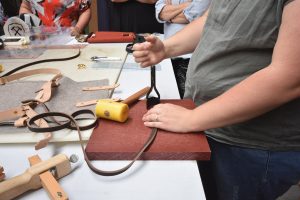
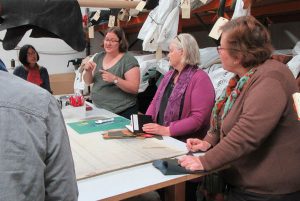
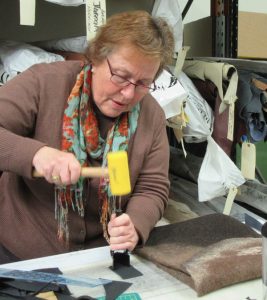
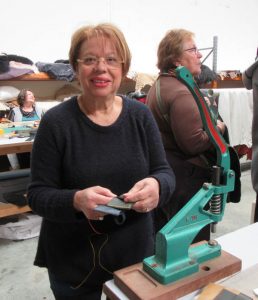
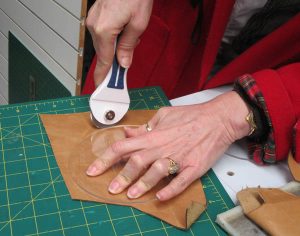
The 2nd day was  devoted to the final fulling, and hardening of the felt, as well as the fitting of  handles, clasps, cords and the final shaping.

It was a very successful workshop.  Each participant was thrilled with their own very individual bag and left having learned many new techniques in the process.