Shrinkage – What’s wrong with percentages? Part 3

Shrinkage – What’s wrong with percentages? Part 3

I think I have ranted enough about  why we need shrinkage rates (and not percentages)  now it’s time to discuss how to apply them.  Firstly, lets address why we need to know how much our felt will shrink.  You always need to calculate this if you NEED a fairly accurate result.  I say fairly as it is almost impossible to replicate an exact size of felt, but shrinkage rates are the most accurate method.  For example:  you need a shrinkage rate if you wanted to make anything that fits over, around, through, between or on an item.  The item may be: hats, slippers, bags, pockets, pouches, clothes, even wraps and scarves.  There’s nothing worse than a wrap of scarf that just isn’t long enough or wide enough or is so big you drown in it.

To apply your shrinkage rate you simply multiply your finished size by your shrinkage rate.

For example:
I want a bag to be 45cm wide and 60cm deep.  My shrinkage rate is 1.7 (anything under this is probably not felted properly and I will address this in another post later.)  The calculation looks like this:

  1. 45cm x 1.7 =  76.5cm
  2. 60cm x 1.7 =  102cm

My template ends up being 76.5cm wide and 102cms deep.  When I am fulling my bag I will keep fulling until it is 45cm wide and 60cm deep.  It will then be fulled.

I can hear some saying BUT my sample is not square!  I will discuss this next post.

I will attach a PDf version of these instructions on the last post so you can print them out.
Shrinkage – What’s wrong with percentages? Part 2

Just to recap using percentages to calculate how much wool to lay is wrong.

For example:
Jane made a piece of felting that ended up 20cm by 20cm.  Soosie admired it and asked how much did it shrink by?  And like so many other people she said, “Oh about 30%”.

Soosie heads off to her studio to make a similar piece and thinks to herself (obviously its not me cos I would have said it aloud.  To my dogs.) “Mmmmm.    It ended up 20cm, shrank by 30% so 30% of 20 = about 7.  I have to lay 27cm of wool.”

Off she goes felting away. BUT when she is finished the piece is only 18cm x 18cm!?!?!  She made it exactly the same way Jane did – same wool, same layers, same decoration yet it ended up smaller.   WHY?

Because 30% of 27cm is 18cm.  Jane laid 30cm of wool to get 20cm of felt.  You can’t calculate something you don’t know the starting measurement of.  Soosie only knew the finished measurement.  Here in lies the big problem with using percentages.  How do we fix this?  Use shrinkage rates.  Once you have determined the shrinkage rate you can apply it to any finished size to calculate accurately your starting measurement.

And the only way to calculate shrinkage is by making a sample.

  1. Cut a piece of bubble wrap or foam or plastic (something durable) measuring EXACTLY 30cm x 30cm to maske a sample template.
  2. Using the template lay the wool EXACTLY the same way you intend to make the final piece.
  3. Felt the way you usually felt.
  4. Measure the finished piece of felt.  For example 20cm x 20cm.
  5. Calculate how much it shrank by:- Original measurement divided by finished measurement.
    30/20 = 1.5  this is your shrinkage rate.

How do I apply a shrinkage rate?  That’s for the next post.

I will attached a PDf version of these instructions next post so you can print them out.

Keep sampling!  Soosie 🙂

Shrinkage – What’s wrong with percentages? Part 1

Now down to business. Anyone who has been at one of my workshops has heard my tirades about this subject. Using percentages to calculate the end result of your felting is wrong. It is wrong – mathematically, logically and importantly feltingly. (Is there such a word? There is now.) When someone says “it shrank by about 30%” could very well be correct BUT you can only calculate that after you have made the felt and NOT before. So instructing, advising or informing someone to just add 30% to the size of their template is WRONG!

For those who are not familiar with shrinkage a little lesson first.

We all know that felt shrinks. The age old question has always been by how much. Well that depends on multiple factors:

the wool – species, micron size, colour, coarseness, fibre length.
the number of layers of wool – odd, even.
what you add to the felt – silk, fabric, decoration etc.
rolling and sanding – which direction, how many times, evenness.
tossing and tumbling – which direction, how many times, evenness.
which way you held your tongue in the corner of your mouth..
I think we’re all getting the picture. There are plenty of things that affect shrinkage. So how can we possibly calculate shrinkage? Make a sample first. This is a pretty good motto for all craft, firstly if you have never made this particular combination of the factors (listed above) before, how do you what’s going to happen? I would rather make a mess of a sample and learn from my mistakes than waste my resources on a larger piece that can not be salvaged and is doomed for the BOYD pile.

Secondly, it is the ONLY way to calculate shrinkage.

So enough ranting for one post, next post will explain the mechanics of calculating shrinkage.

Keep felting! Soosie 🙂

BOYD The Purple Bag

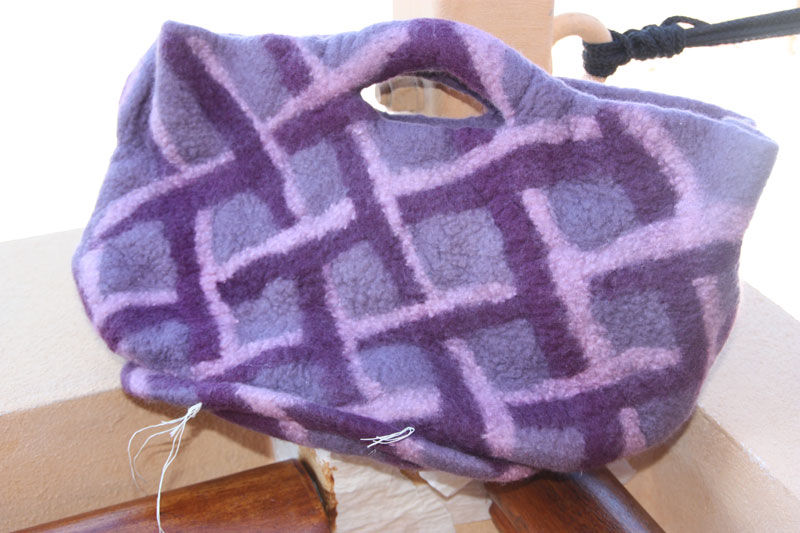
This one was a little harder than the cozy, mainly because the colours were so strong they dominated any view of the bag. One side had what I called lattice work and the other eyes. Again this forlorn piece was brilliantly made. It had a beautiful retro 50s shape to it – which is probably what drew me to it, it reminded me of my grandmother’s handbag (which I still have). It was fully fulled, strong and wonderfully constructed. A lot of thought had gone into its construction – no visible seams or stitching, sturdy handles and reinforced bottom edge all perfect for a handbag.

The creator told me she was experimenting with a 3D look, wanting it to appear as tumbling blocks or bulging eyes, in an Escher-esque style, so hence the combination of colours. It nearly worked. I couldn’t see anything but the purple until I piled a whole pile of stuff around it. I would shuffle it every day; add some, take some, move some, until I placed the green glass beads next to it and Voila! I could see past the purple.

Next dilemma was what pattern or design with which to use the beads. The lattice was relatively easy to imagine but the other side gave me some grief! Firstly I thought of peacock feathers using the eyes as the eye of the feather but the scale was wrong. I tried to make petals to surround to eyes but again the scale was wrong. Eventually I decide to make flowers similar to a passionfruit flower. I forgot to take a photo of that side which I will rectify next Toss’n’Tell. (lol).

CPR applied:

1. Applied steam to reshape the bag.

2. Stuffed and pegged it into shape.

3. Couched the yarn to make the vine.

4. Stitched on the beads. Cut the leaves from left over foiled felt.

5. Glued on the leaves.

6. Cut – “Angel Hair” circles and millefiori felt beads, stitched beads to top and glued the lot on.

7. Glued on the leaves.

The lattice work side.


The eye side. The pegs were there to redefine the shape.


Stuffing the bag helped regain its wonderful shape.


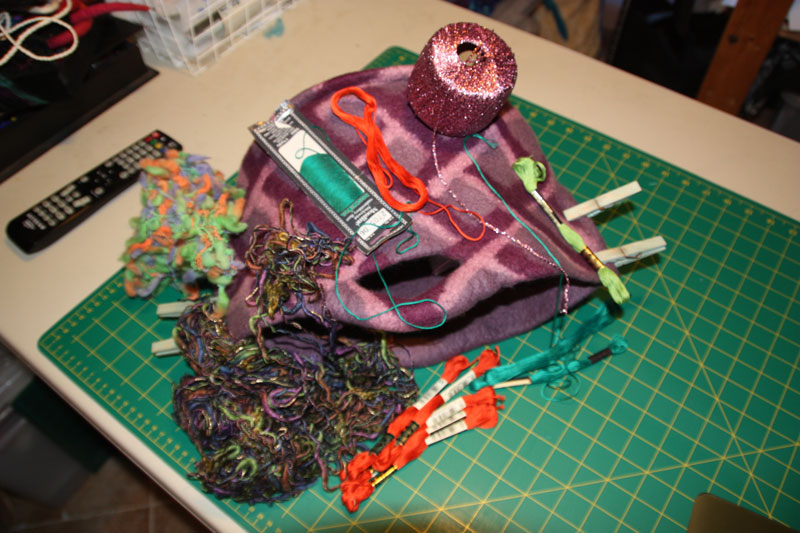
Gathered stuff – waiting for the design to “come on down”. Pegs still attached.


Autumn – lattice side finished with vine and fruit.


Eye side with prospective peacock feather. Didn’t work – in the end they became Summer – vine and flowers.

BOYD Teacozy

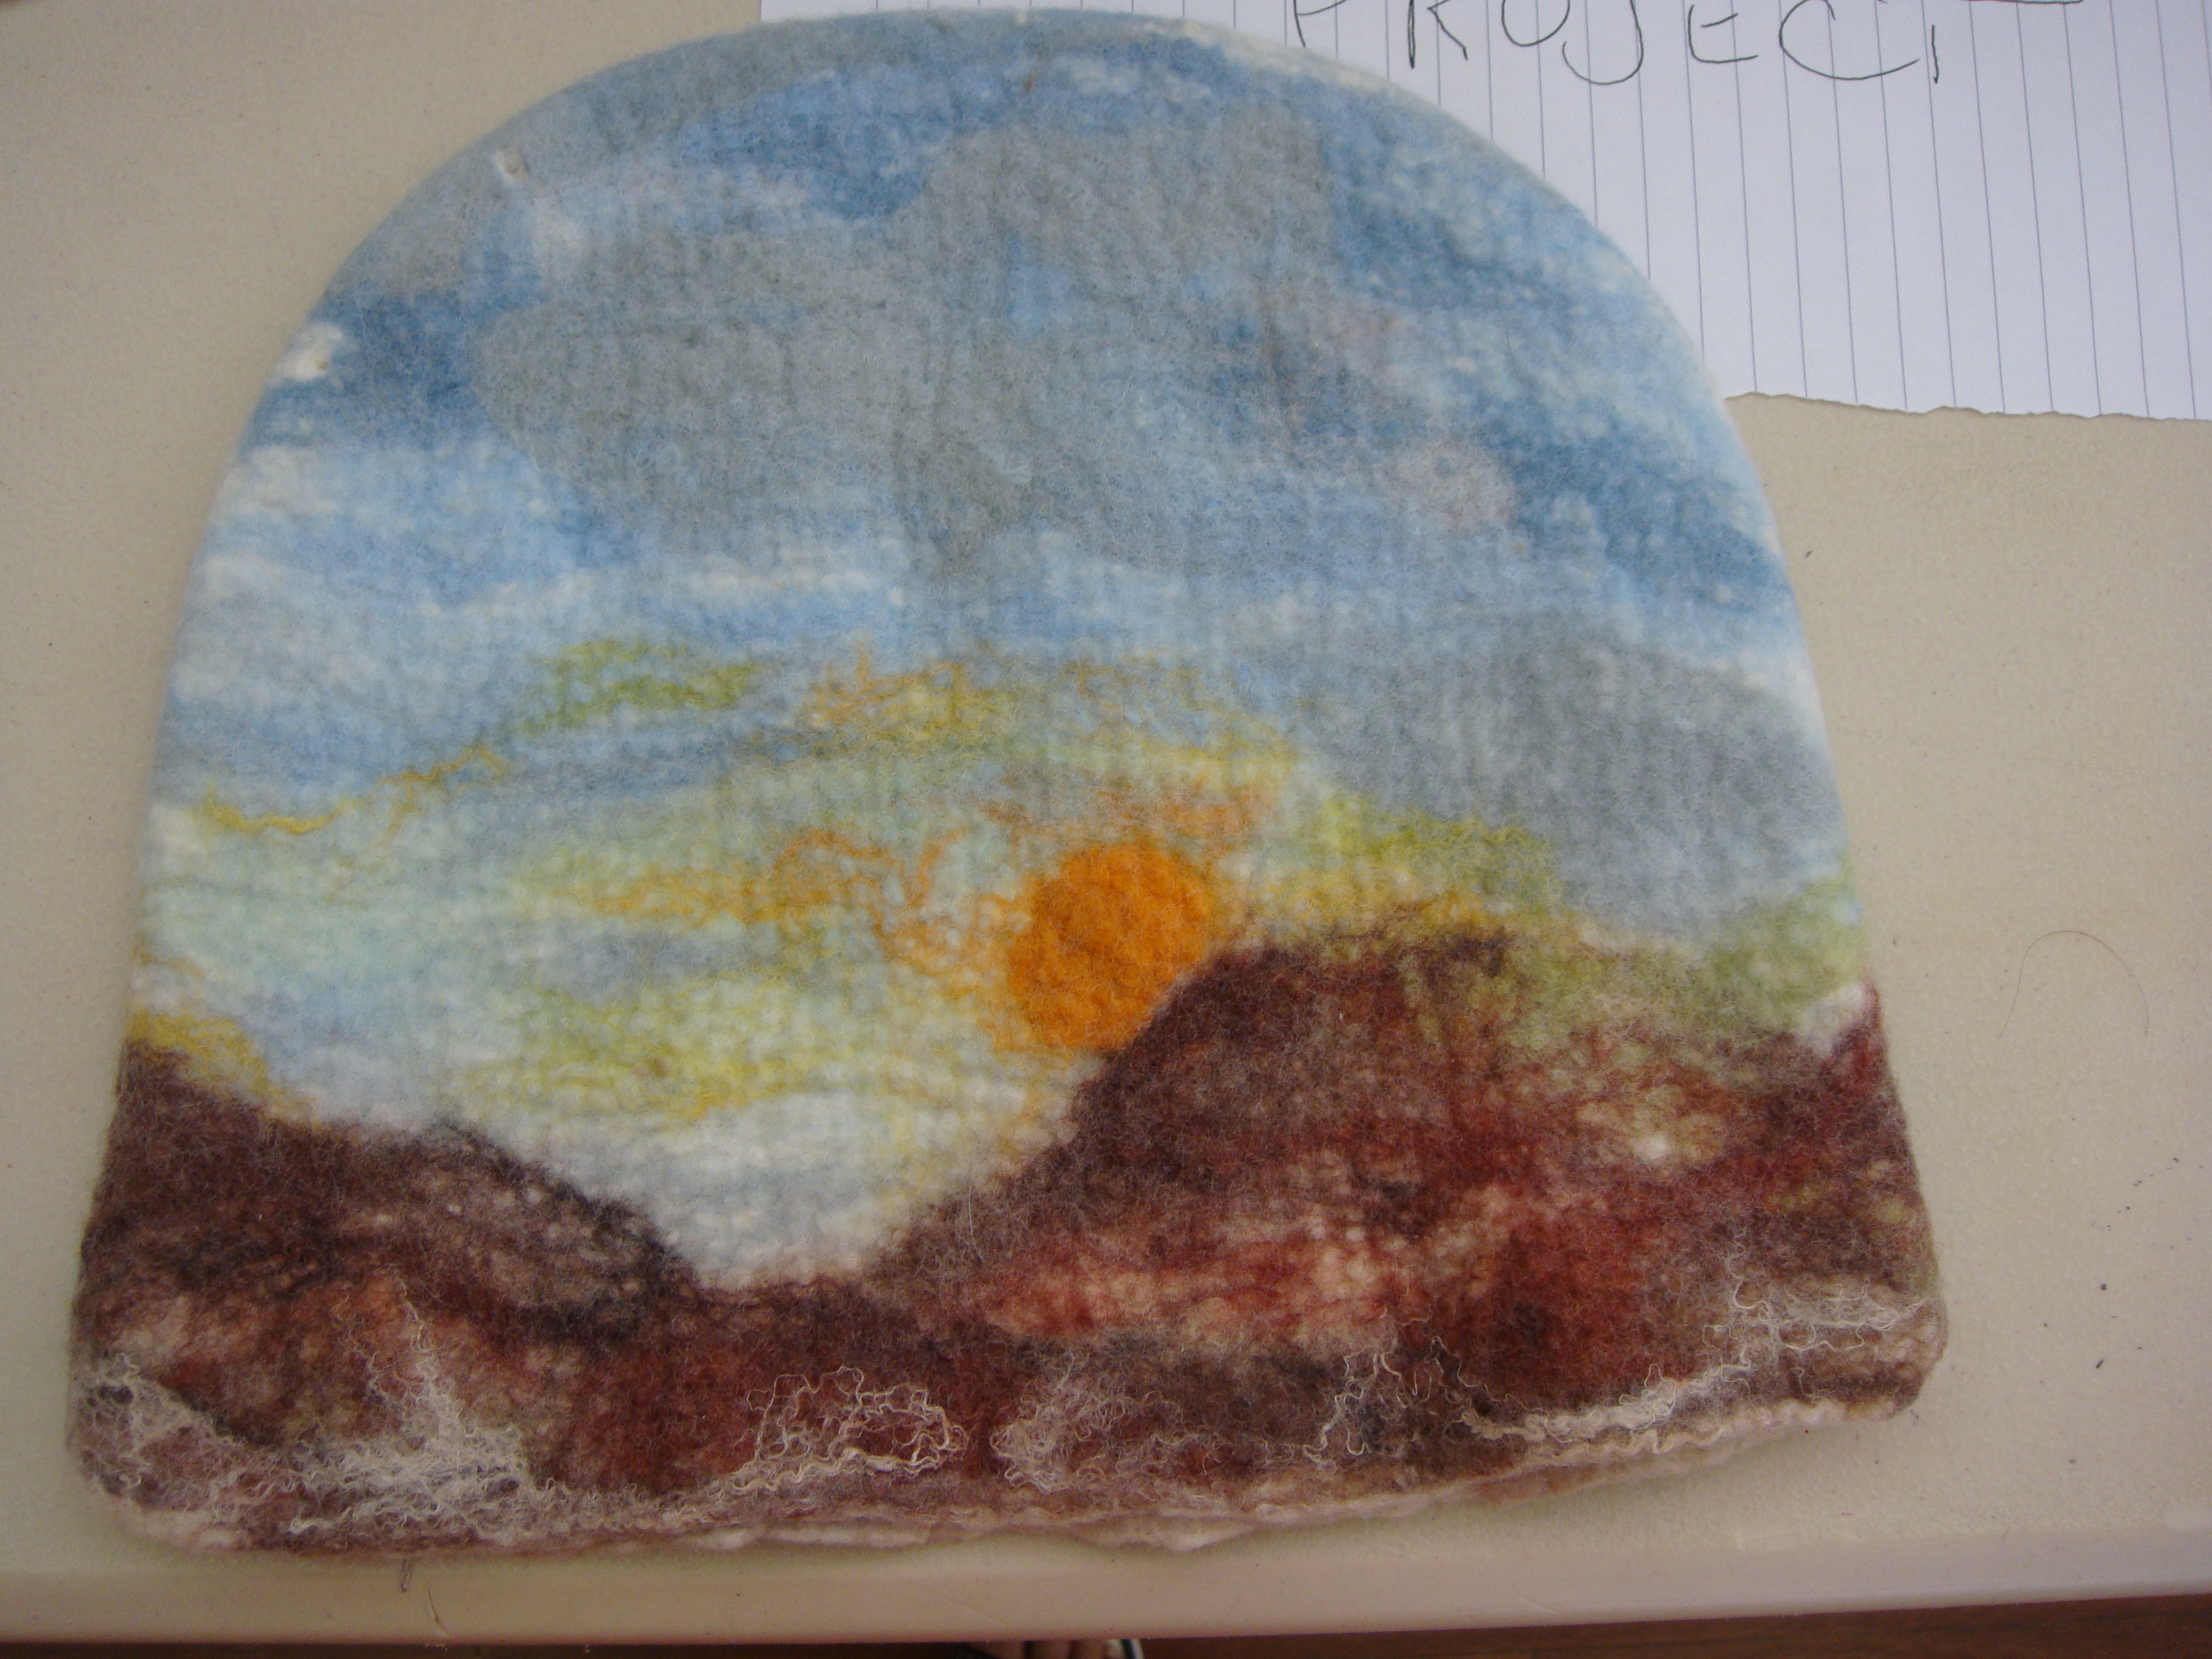
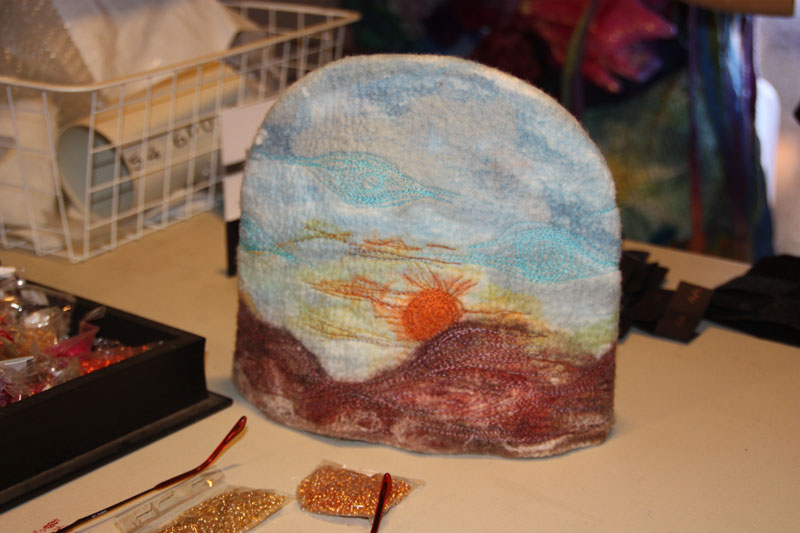
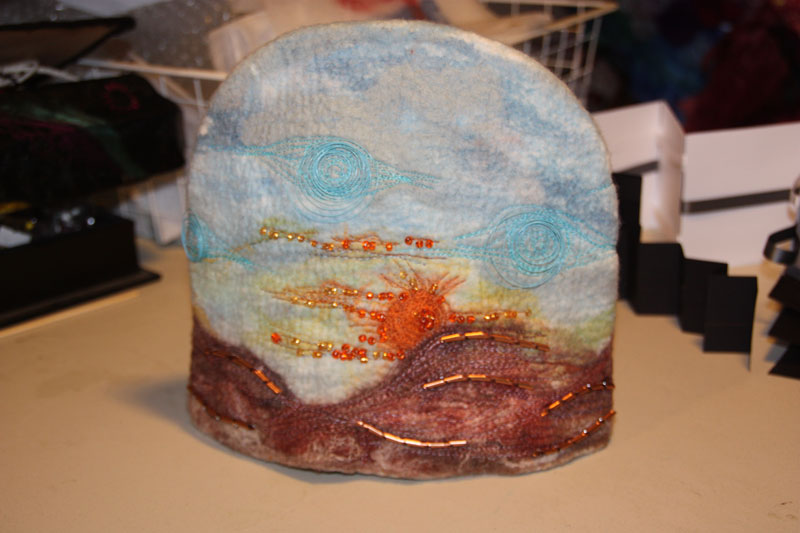
I chose this one as it reminded me of a Van Gough painting – it just needed some detail. It was very well made and the colours had been laid thoughtfully. What to do to it? I gathered all kinds of bits and bobs together and left them on my table hoping inspiration would leap out at me. And eventually it did, I took the Van Gough idea and tried to exaggerate the swirly flow of the wool whilst trying to keep the integrity of the piece. Now to the CPR:

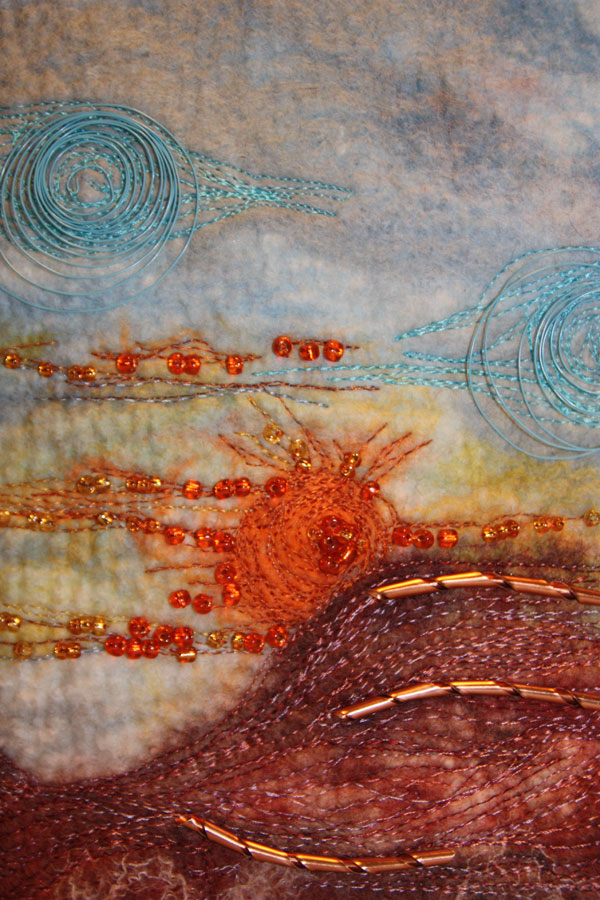
1. I free machine embroidered it first – to give some depth to the felt.

2. Beaded the sunrise and sunset.

3. Coiled some jewellery wire and sewed them onto the clouds for texture.

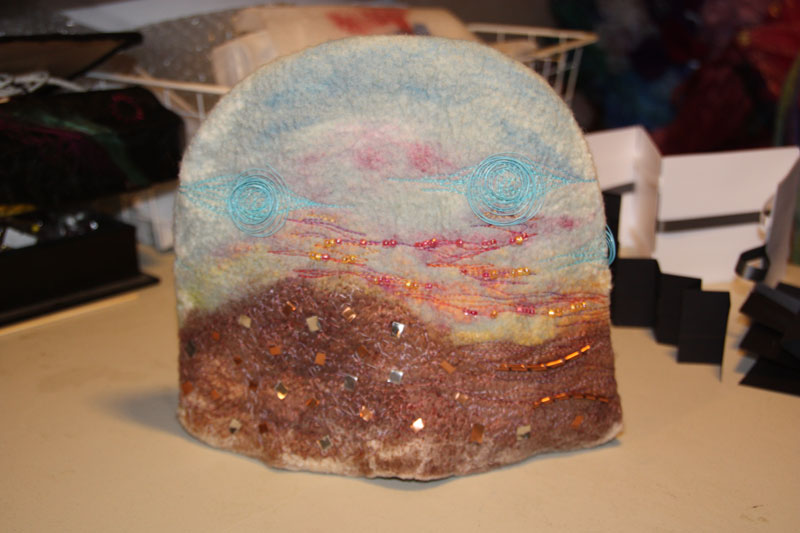
4. Twirled some copper sheet strips and glued them on.

5. Cut some more sheet into squares and glued them on.

Next post the Purple Bag.

The pronounced dead original. Nice colours and thoughtful design but lacked some ophm. Very well felted – evenly laid, fully fulled and strong.
First the free machine stitching. I wanted fine dense stitching so chose machine over hand stitching.


Back of cozy.


After all the stitching it still needed some more ophm. So on with some beads. It needed more texture – metal of course! Thin strips of fine sheet metal twirled around a satay stick.


The pattern on the back meant the twirls didn’t suit, so i cut them into “squares”. I used “tacky” craft glue to attach them.


Detail front.

BOYD or the Bring Out Your Dead Project

Our year long project for 2012 has been BOYD – Bring Out Your Dead; a challenge to “fix” pieces that other members have deemed dead. I love this! I resisted at first.  I looked at some of the dead and heartily agreed they should stay dead, but on closer inspection I could see that these sad, rejected poppits had a place in our ongoing quality discussion. What struck me was that most of these Boyds were extremely well made pieces of felt; fully fulled, strong, durable and some really good shapes but what made their owners abandon them to a dark shameful corner of their studios?

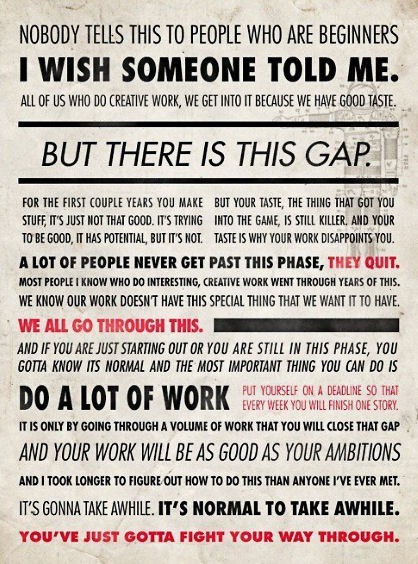
Mmmm. I pondered this for a while and through a wonderful instance of serendipity I came across a really insightful statement about our creative processes (see image below). Although aimed at beginners in any creative field it is also appropriate for us “old hands”. Sometimes what we have in our heads does not match what we produce, this isn’t always a bad thing, sometimes we create what we should have created despite what’s in our heads. But (there’s always a but) sometimes this preconceived idea of what it should have been, clouds our perspective of what it became. It’s not how I wanted it so it’s going in the cupboard! We are all guilty of this. I have a box of them.

Over the next couple of posts I will talk more of my process to revive the dead.

Why didn’t someone tell me?

Copyright Article

Sue Eslick as kindly provided the following articles about copying.  Hope you enjoy. Soosie

Copyright

When Marjolein Dallinga visited Perth in 2012 she shared with us her views on the myth of intellectual copyright and gave us copies of the following two articles.  As artists, felters are very conscious of not copying the work of others – at least not selling or teaching ideas that have come from other people. However, these articles point out that it’s not that simple.  Ideas don’t come from a vacuum – we are all influenced by and learn from what we see. Whilst we may be able to identify who has introduced us to a new technique or design idea, can we really say that the idea ‘belongs’ to that person? They too were influenced and learned from others, and these other people may or may not be acknowledged. Take a look at these articles and let us know what you think this means for our community of felters …….

  1. Elephant-Article about COPYING
  2. About copying

Is it cheating?

I have had a few curious conversations about technique of late, and I can’t fathom where this has come from.  There seams to be this underlying current of almost an elitism about technique and skill; that some kind of purism has crept into our craft.  What am I talking about?  That some techniques are viewed as cheating.

Is it cheating if I glue something onto a piece?  Is it cheating if I use a pattern instead of free hand?  Is it wrong if I stitch up a hole – one that I didn’t intend to create?   How about if I cut some superfluous bit off?   What if I sewed a prefelt down? This isn’t to say that we should approve of slapdash methods (anyone who comes to Toss n Tell knows of my soapbox tirades on shrinkage, and we have discussed much about quality) but I don’t think that using alternative technique is wrong.  As long as  it is well executed.

Lets have a look at some basic definitions.  Felt making is a craft, so lets start with that, according to one of the many online dictionaries the definition of craft is: Skill in doing or making something, as in the arts; proficiency. An occupation or trade requiring manual dexterity or skilled artistry.

Next the definition of skill:  Proficiency, facility, or dexterity that is acquired or developed through training or experience. An art, trade, or technique, particularly one requiring use of the hands or body.

The highlights for me in these words are proficiency through training or experience.  It doesn’t say anywhere that I can’t glue, stitch, chop, fold, bend or mend my felt.  Maybe if we were willing to include other skills and techniques into our felt we could eliminate the BOYDs (Bring Out Your Deads) in our studios.

Soosie 🙂

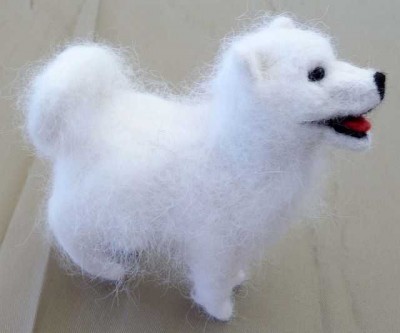
Needle felting by Kate Ryder

I stumbled across needlefelting about 3 years ago just by being inquisitive. So, the story starts at the Craft and Quilting Show at Claremont and I was rummaging about in the boxes in one of the stalls, when I came across some Needlefelting Needles. I didn’t buy any at the time because I thought they were for a sewing machine (I hate sewing!!), but when I got home, I surfed the net on Needlefelting was and found a whole new world of felting. So I purchased some needles, some foam from Clark Rubber and because I am a spinner, I had the fibre to start something.

I thought I would begin with an alpaca as I am also a member of the Alpaca Craft Group and off I went about creating my new little creature. I had no idea how to start it – so I created as I went. You see I thought everything had to be added at once, so I was trying to do the body with the legs and the neck all in the one action. I have since found out sooooo much more and learnt so much just by reading and You Tube and by doing and I do things differently now!

I believe that a good piece is one that can be handled and touched. I create very solid parts of my piece, so that when you press the piece, there isn’t much of an indent. It should be a hardy item. However, I do display my items in plastic boxes now to save on them collecting dust. Some of my pieces have been made using an armature which is a wire supportive core. I have used plastic covered garden wire or pipe cleaners depending on what I am doing. This kind of core gives the piece more support and you can then bend the legs/arms into different positions and still keep them attached! Other pieces are free form and for animals, I always start with the head of the animal, then I have a base to start with for size etc. I find the expressions on the faces of the animals the hardest to do and I spend many hours on the heads. I enjoy Needlefelting as I feel I have more control over the end result and I can do this form of felting anywhere – even when I sit down at Fremantle watching the big ships! I have a website if you would like to have a look: www.spinagoodyarn.com I still have a lot of pictures to upload, but in the meantime, I hope you enjoy what I have on the web. I do commissions for people who have sadly lost their furry friends as well as requests for all sorts of things.

Yours in felting, Kate Ryder